
Getting an Odoo environment ready and the basic configuration both done, it is time to click around Odoo's screens.
Odoo is built so that nearly every screen works the same way, so the basic operations are very easy to follow and quick to pick up.
1. The main view types
Odoo's screens for showing data come in several view types, each with a name of its own. It is worth understanding how to switch between them and what each one is for.
(0) How to switch view
Every view but the form view is changed by clicking the icons at the top right of the screen. (Which view types a screen can show is fixed per screen.)

(1) Form view
The view type shown when you look at one record in detail, or create or edit one.
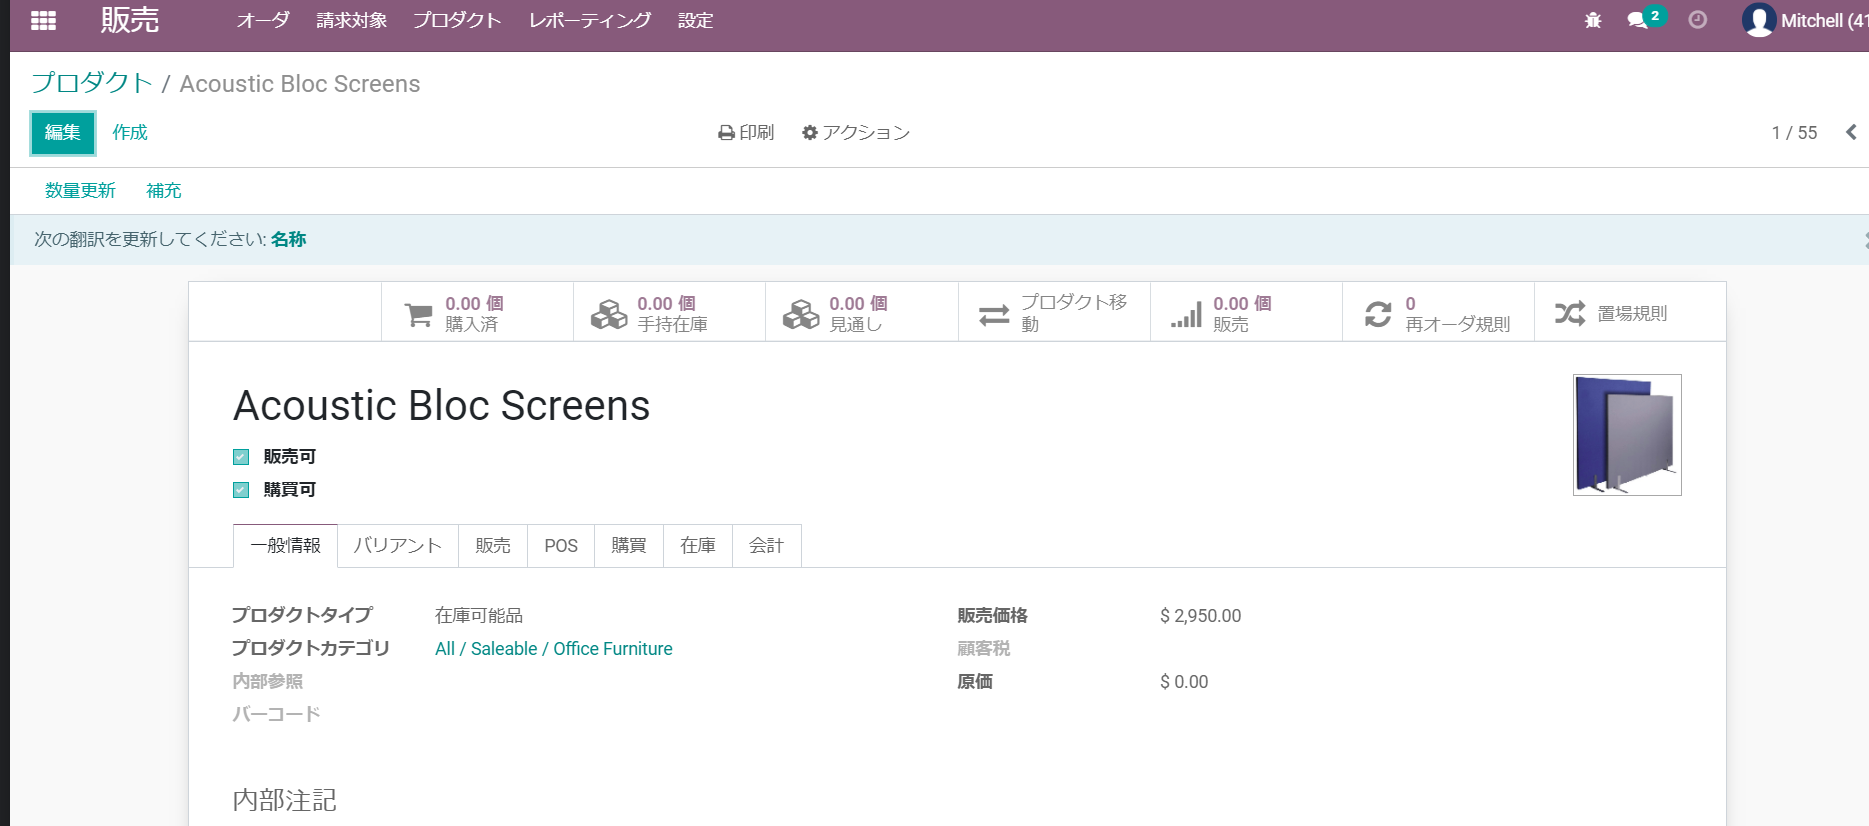
The product master in form view
(2) List view (tree view)
The view type that shows records as a list. To change which fields are shown, click the three dots at the right of the column headings and choose from the drop-down.
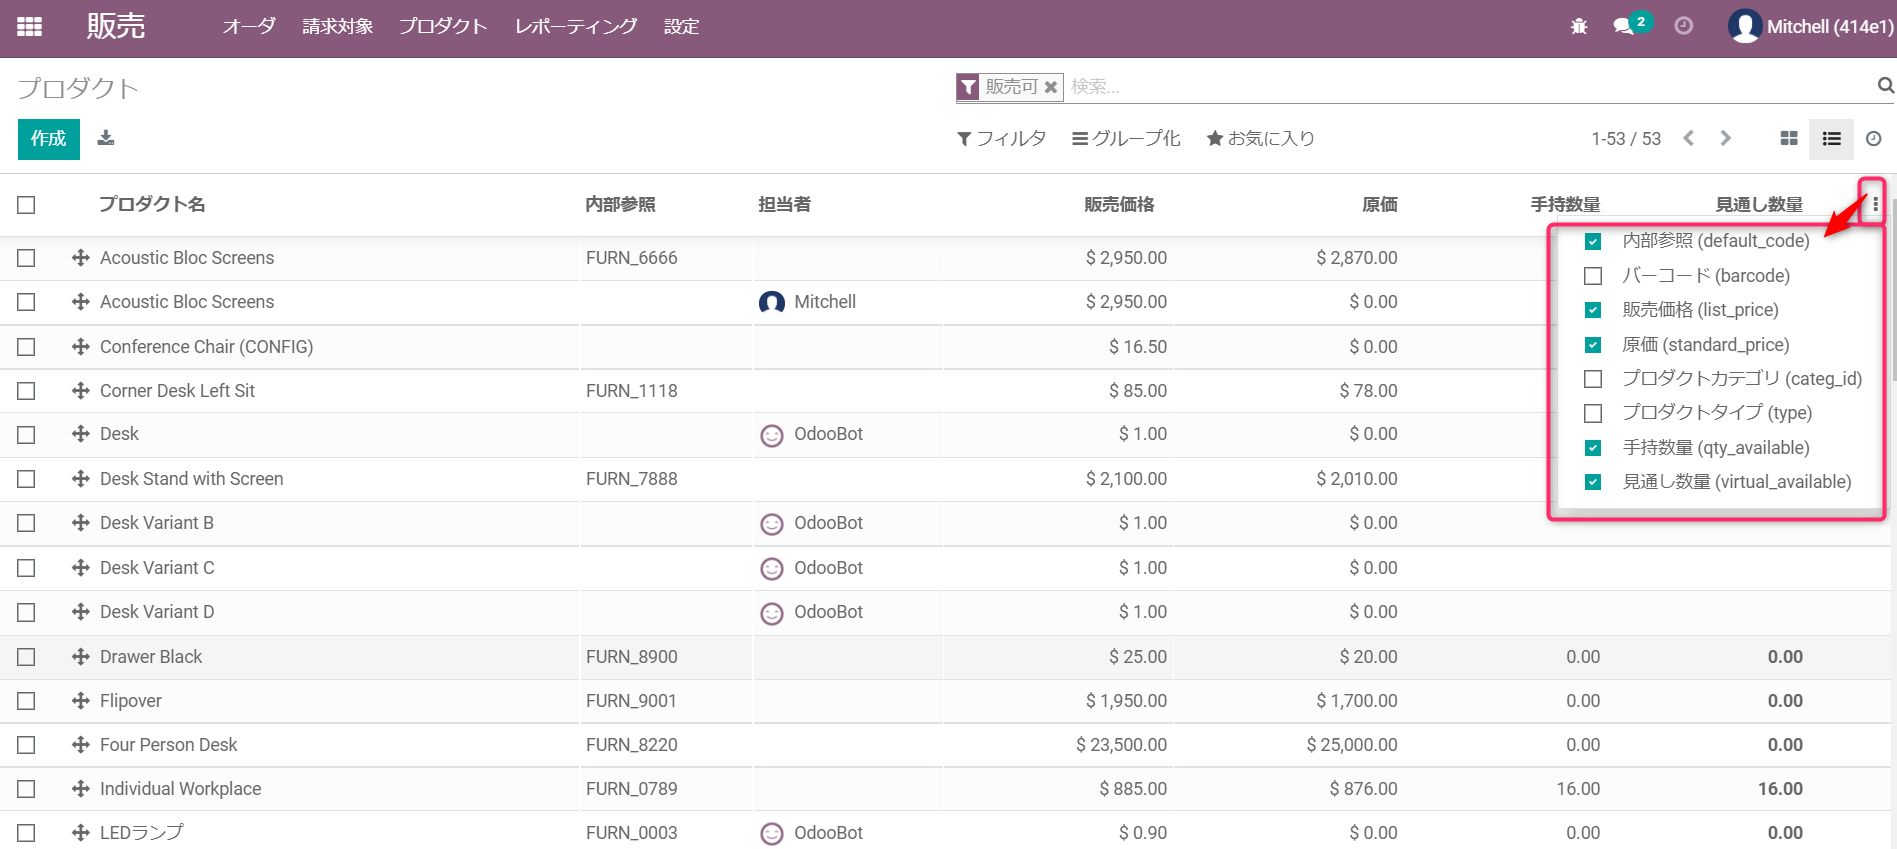
The product master in list view
(3) Kanban view
The view type that lists records with their images.
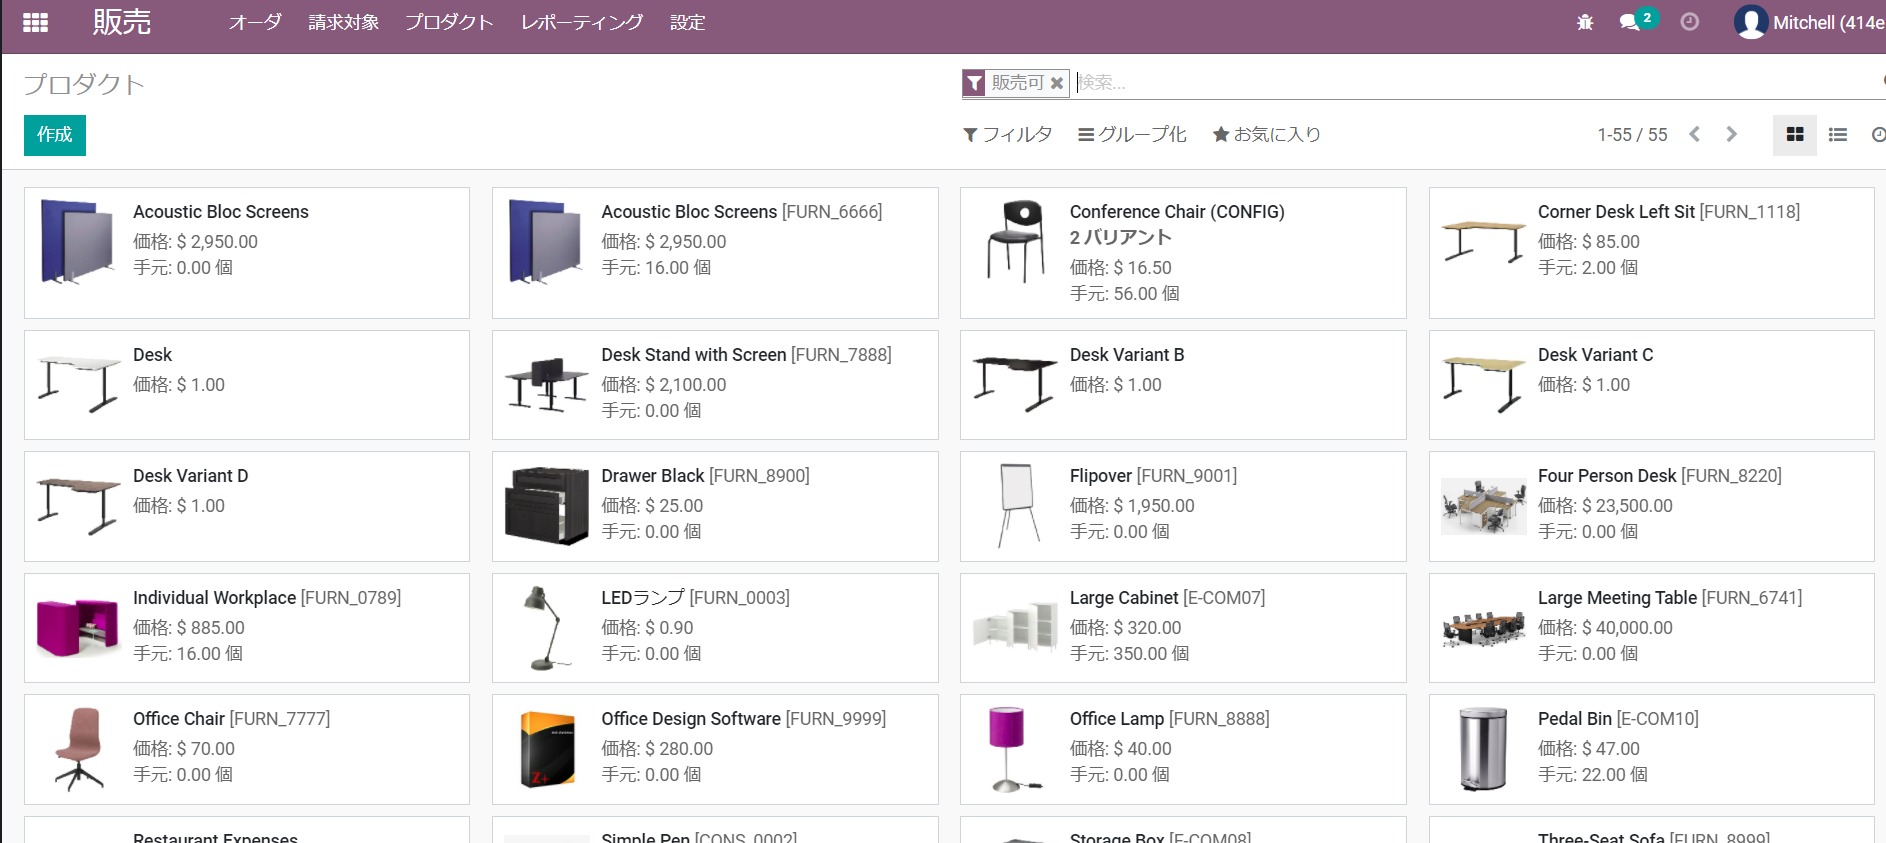
The product master in kanban view
(4) Graph view
The view type used by the reporting features, which shows a graph for analysis. Clicking the icons at the top left changes it between a bar chart, a line chart and a pie chart.
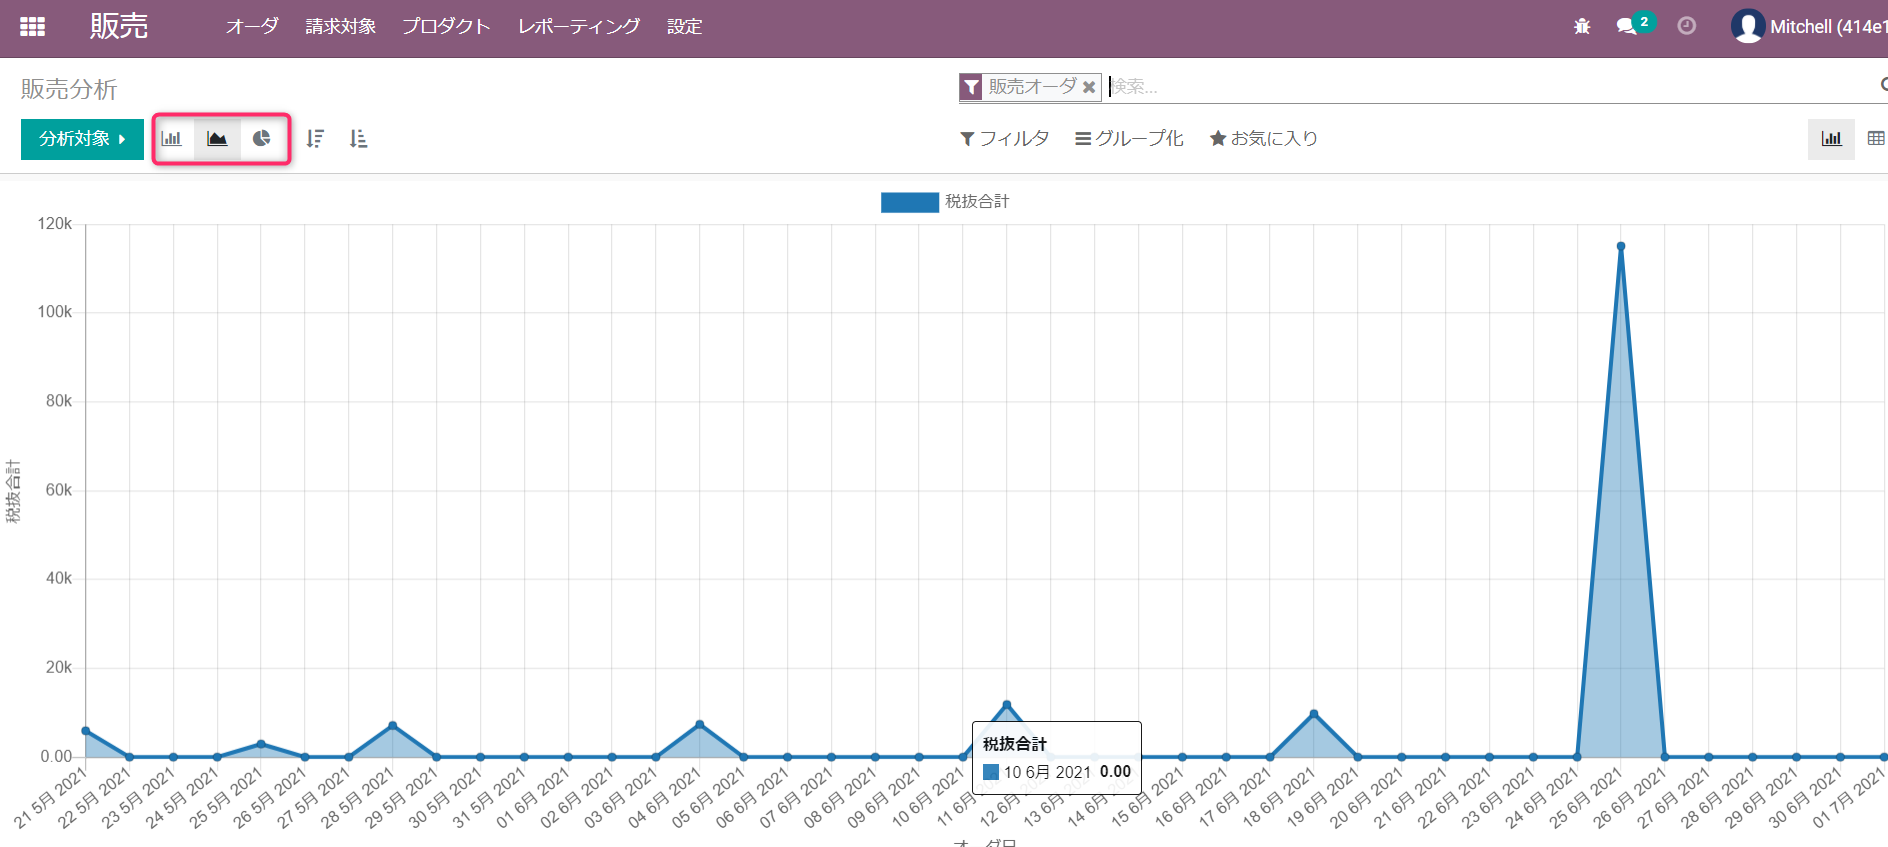
Sales analysis in graph view (Sales > Reporting > Sales)
(5) Pivot view
The view type used by the reporting features for analysis in a spreadsheet form.
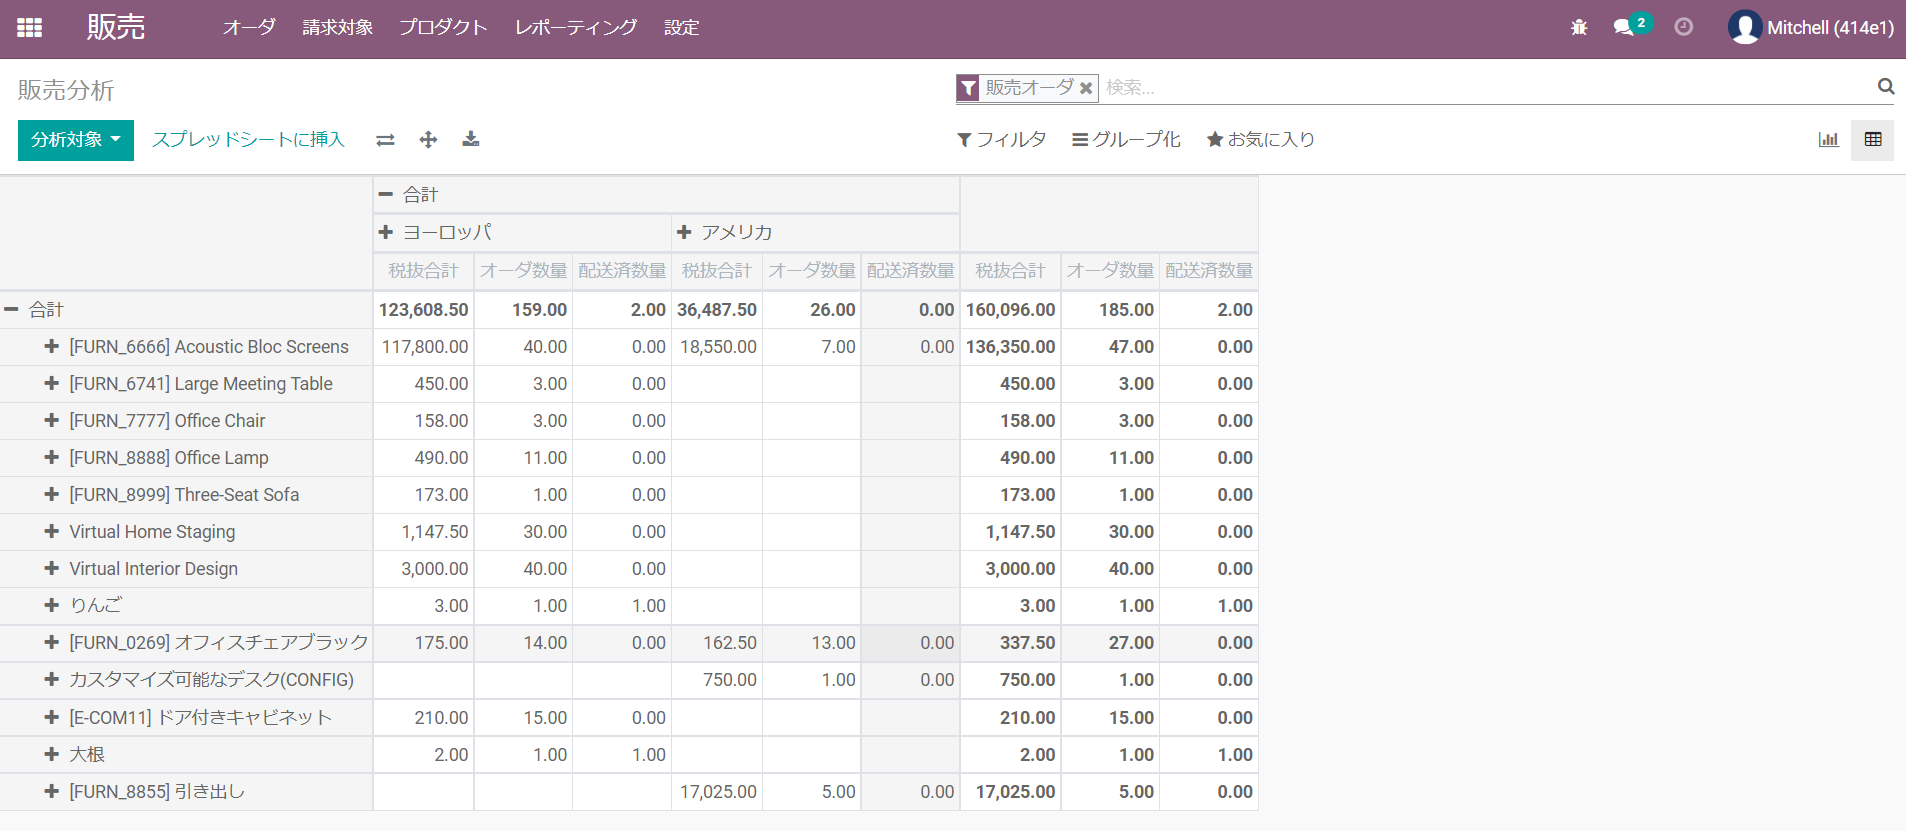
Sales analysis in pivot view (Sales > Reporting > Sales)
2. Search, filter, group by, favourites
(1) Search
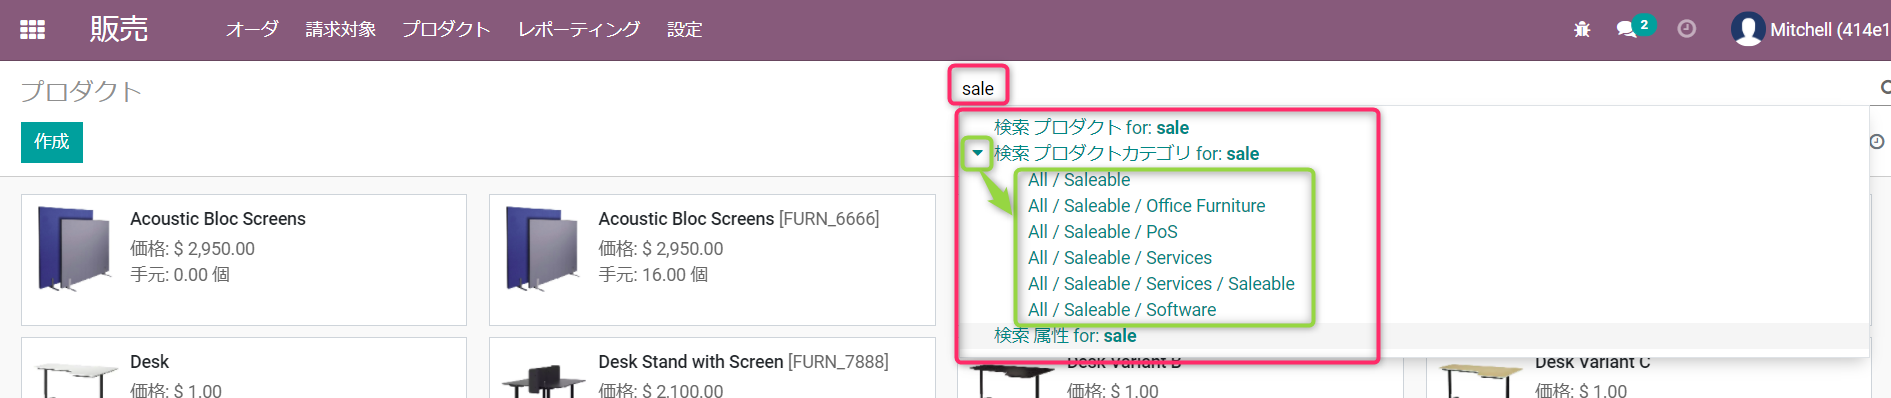
Type into the search bar and a drop-down of fields appears; choose the field you want to search on.
Say you are on the product master and want the products whose product category contains "sale": choose Product Category from the drop-down and the products whose category contains "sale" are shown. To narrow it to a particular product category, click the ▶ on the left and the categories containing "sale" appear for you to choose from.
(2) Filters
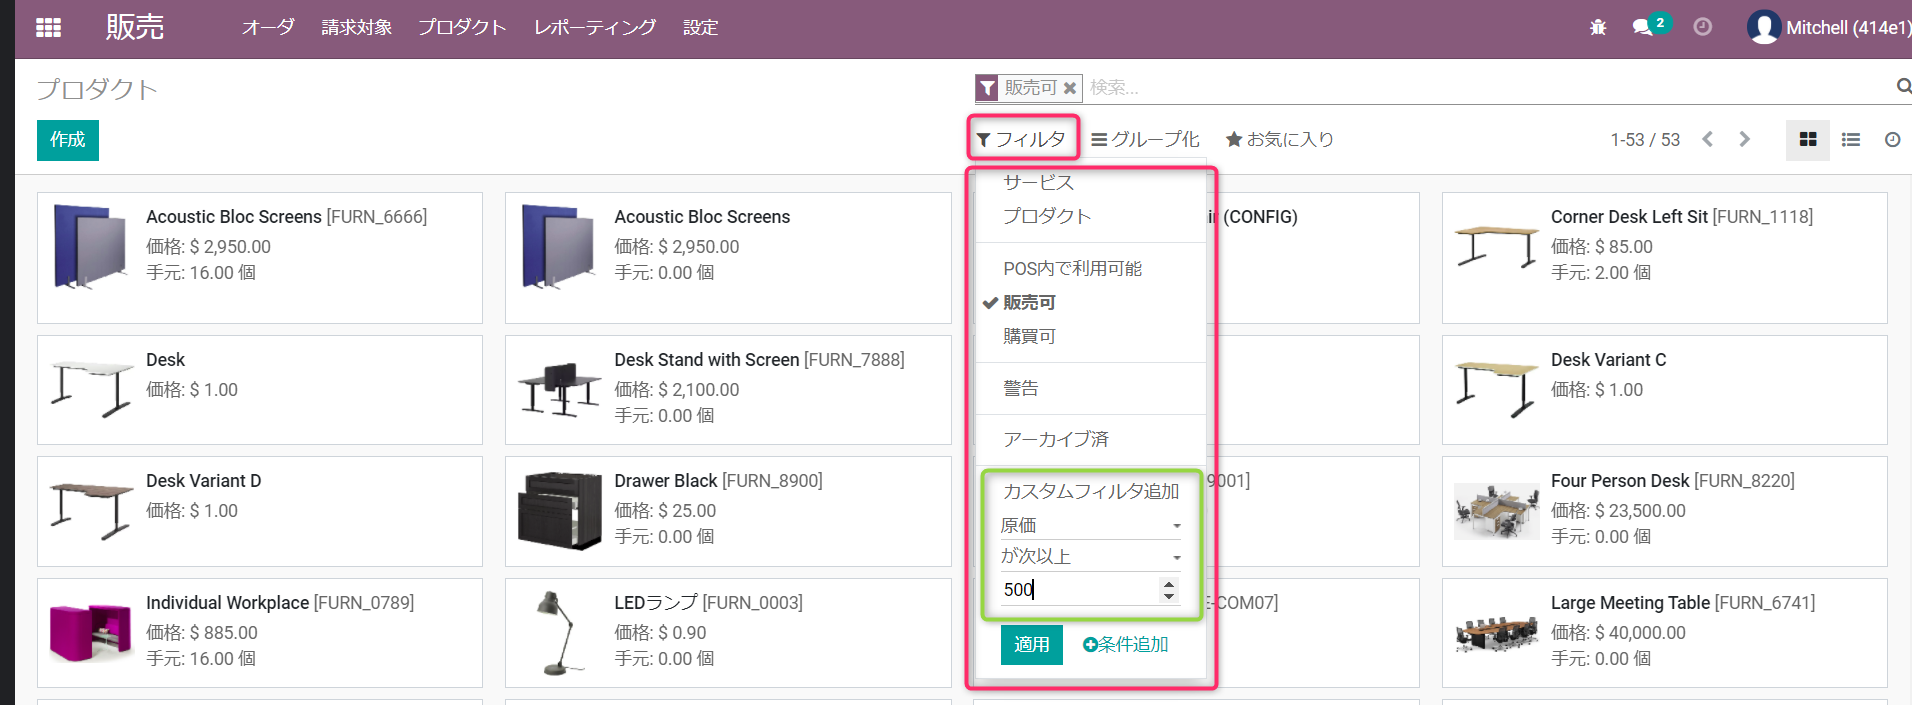
Click the Filters button and a drop-down menu appears. Click the item you want to filter on and only the matching records are shown. (Open the product master from the Sales menu and a “Can be Sold” filter is set by default.)
If you choose “Add Custom Filter”, specify the field and the condition to filter on and click the Apply button.
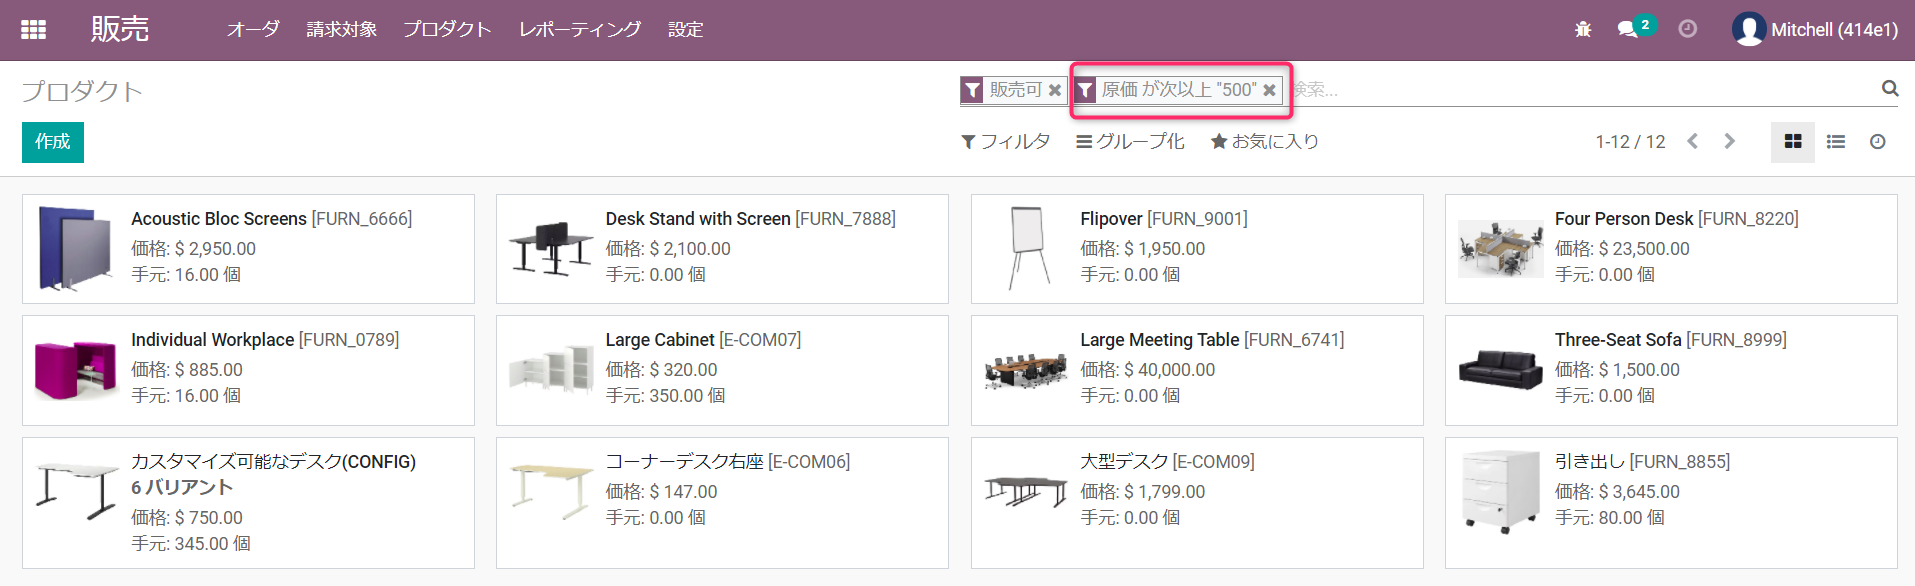
The filter has been added. To take a filter off, click its “×” button.
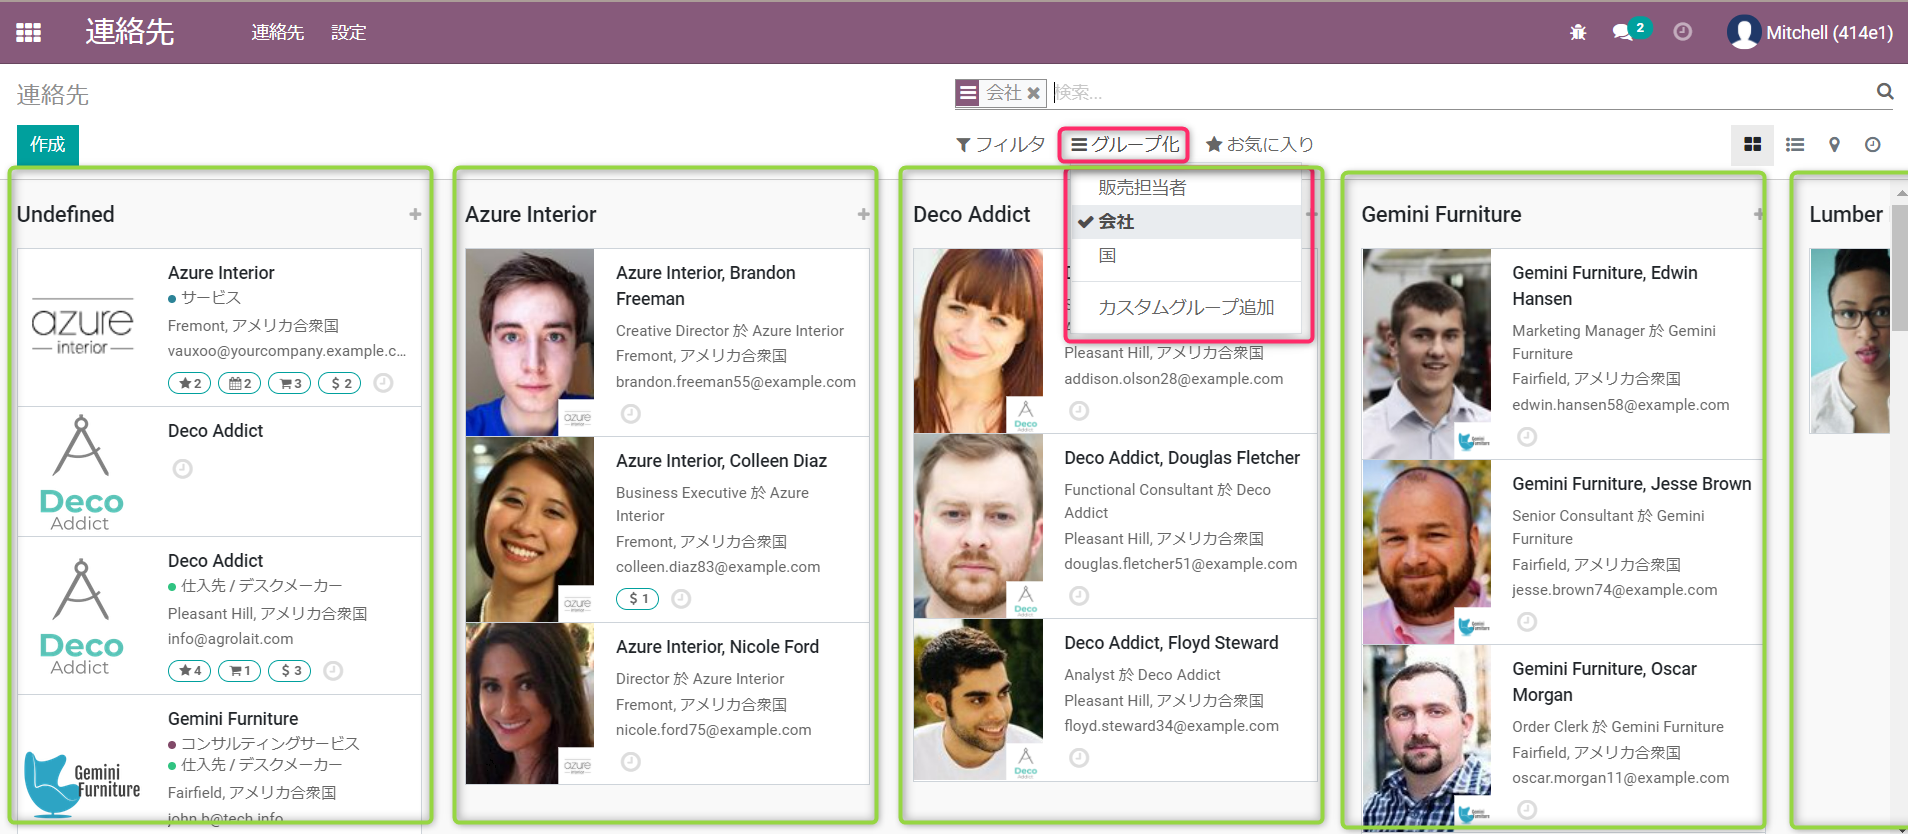
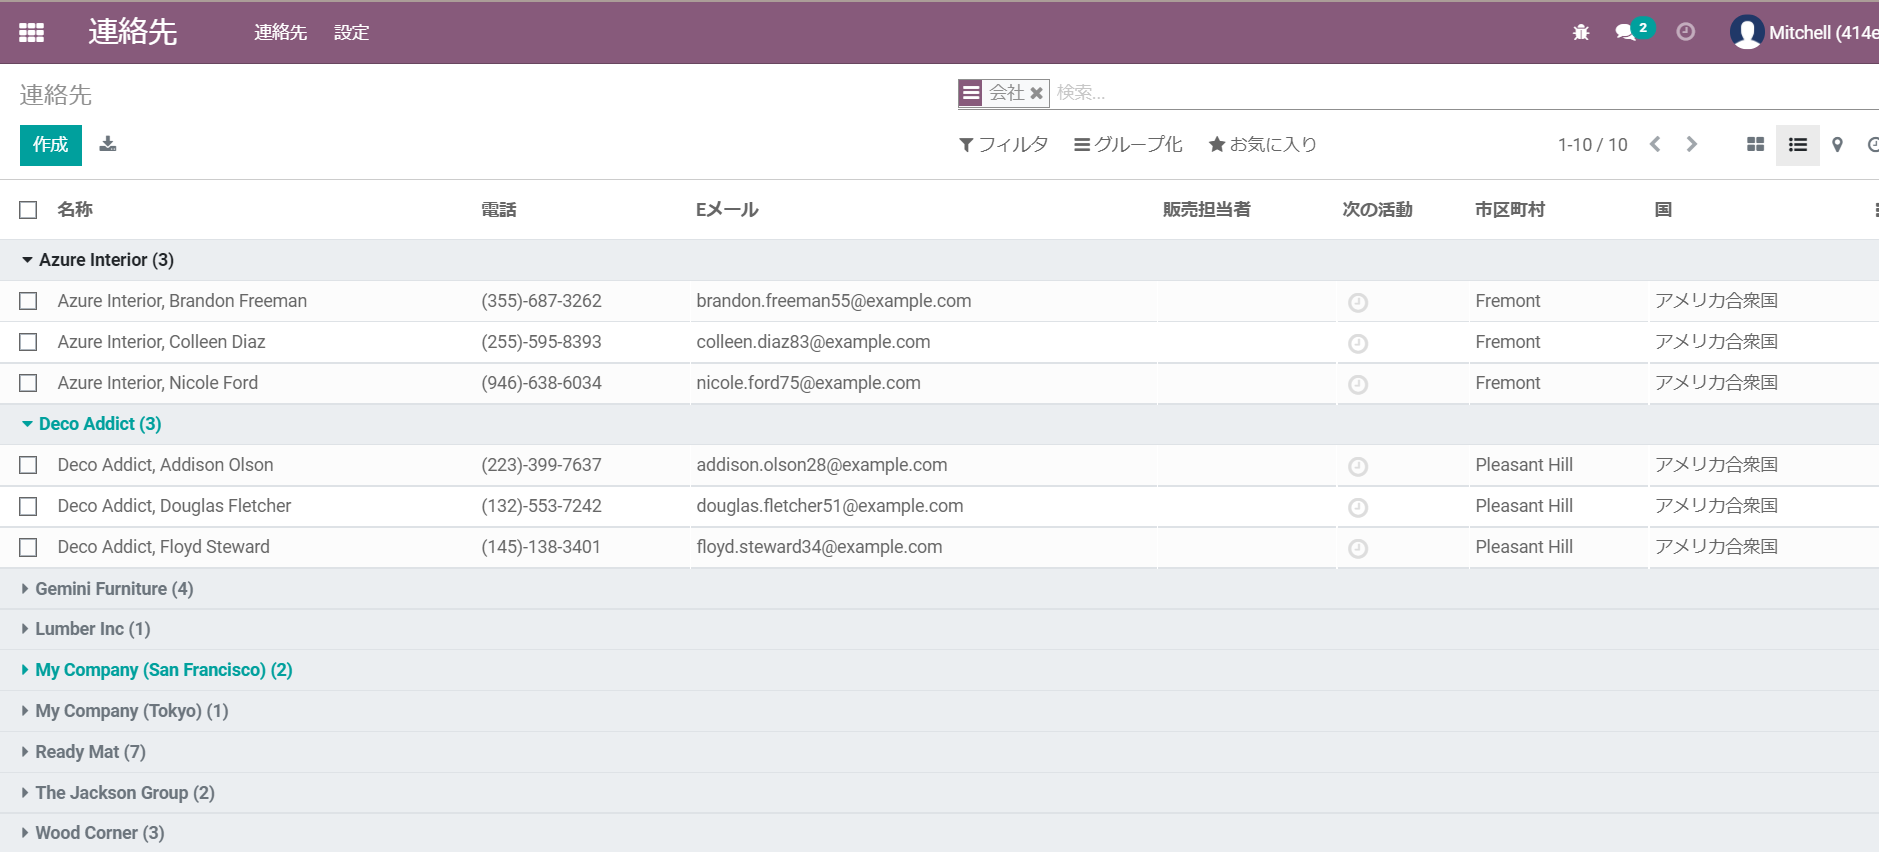
(3) Group by
Click the Group By button and choose a field from the drop-down, and the records are shown grouped by that field.
For the kanban view:
For the list view:
(4) Favourites
A set of display conditions you use often can be saved as a favourite. With the conditions in place, click the Favorites button, type a name and click Save.
Tick “Use by default” and these conditions are applied whenever you open this screen.
Tick “Share with all users” and other users can use the saved conditions too.
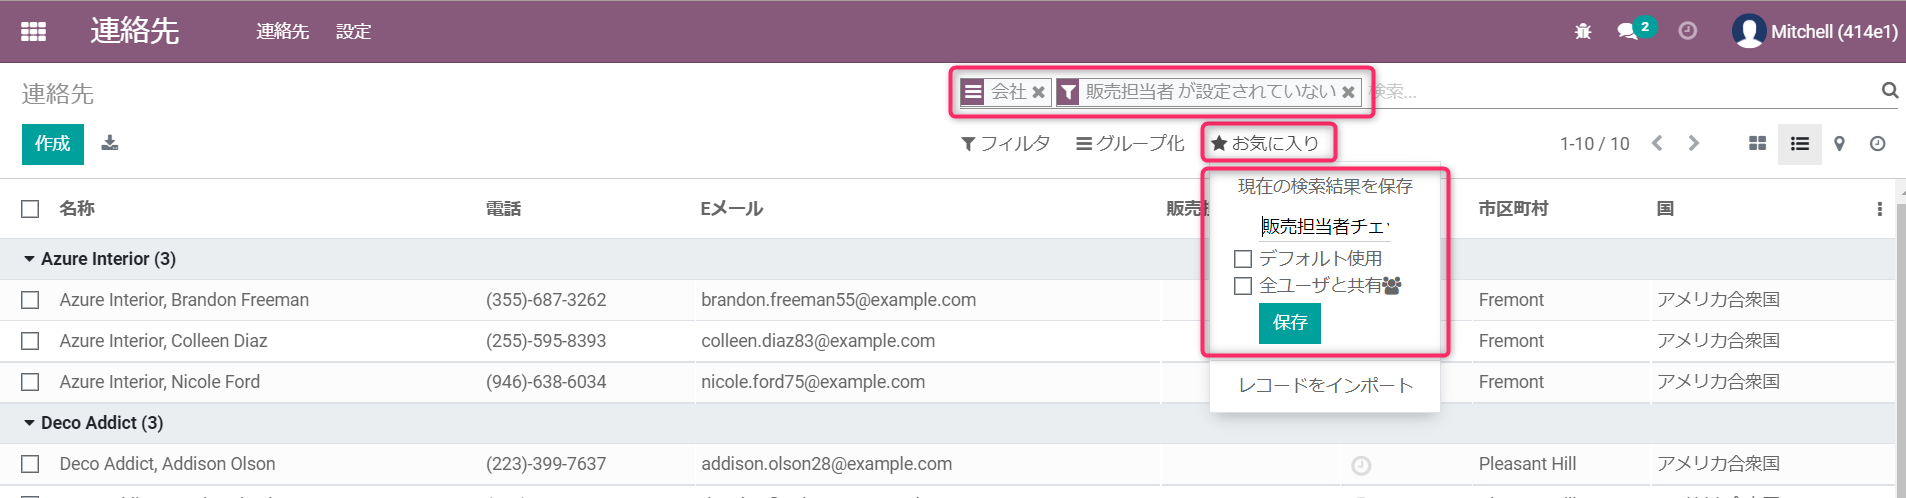
It then appears in the Favorites drop-down menu, and choosing it puts the saved name in the search bar.

3. Working the screen
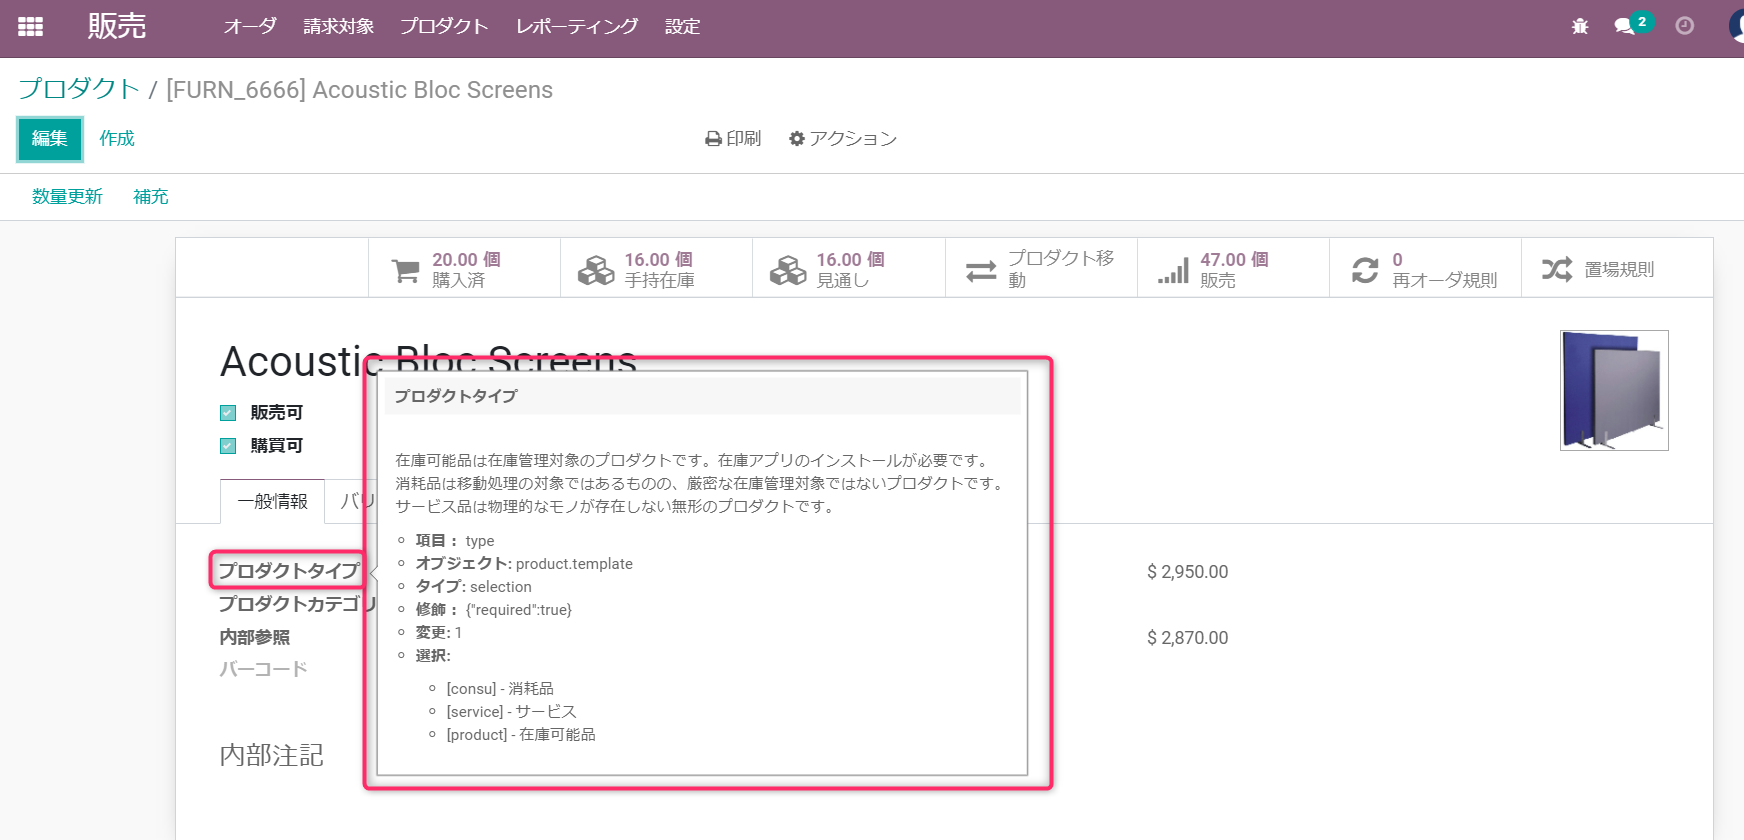
(1) Showing the help text
Put the cursor on a field label and the help text appears.
※ With the developer mode on, the field and object names are shown as well.
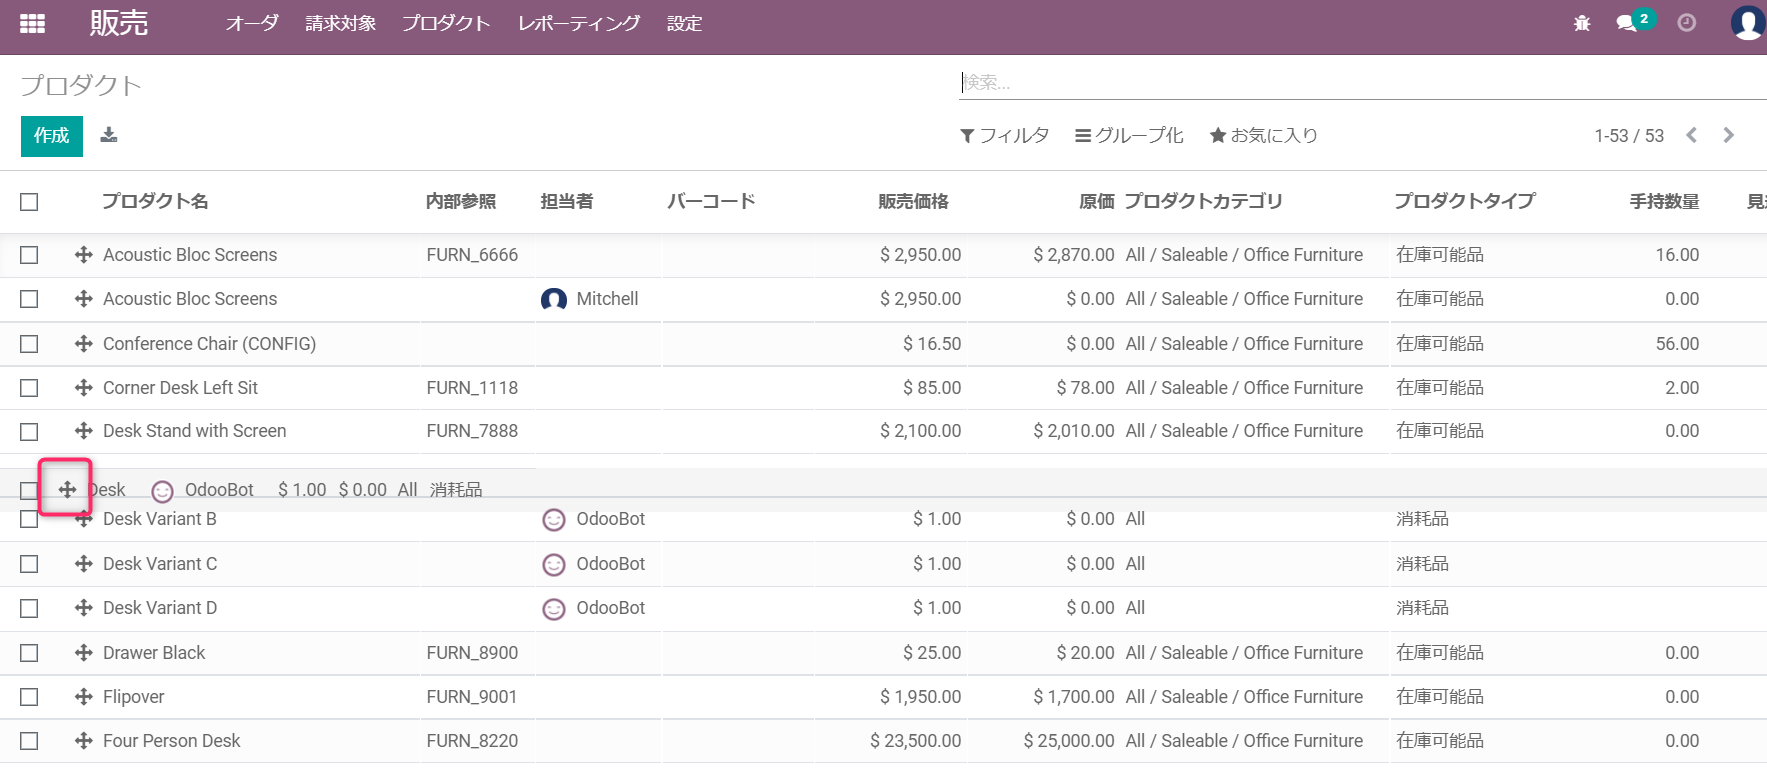
(2) Changing the sequence, that is the display order
On a list view carrying a “✛” mark, dragging that mark changes the order things are shown in.
(3) Records shown per page
To change how many records a page shows, change the record count at the top right of the screen.
On this screen, for instance, change it to "1-515" and every record is shown on one page.

(4) The breadcrumb trail
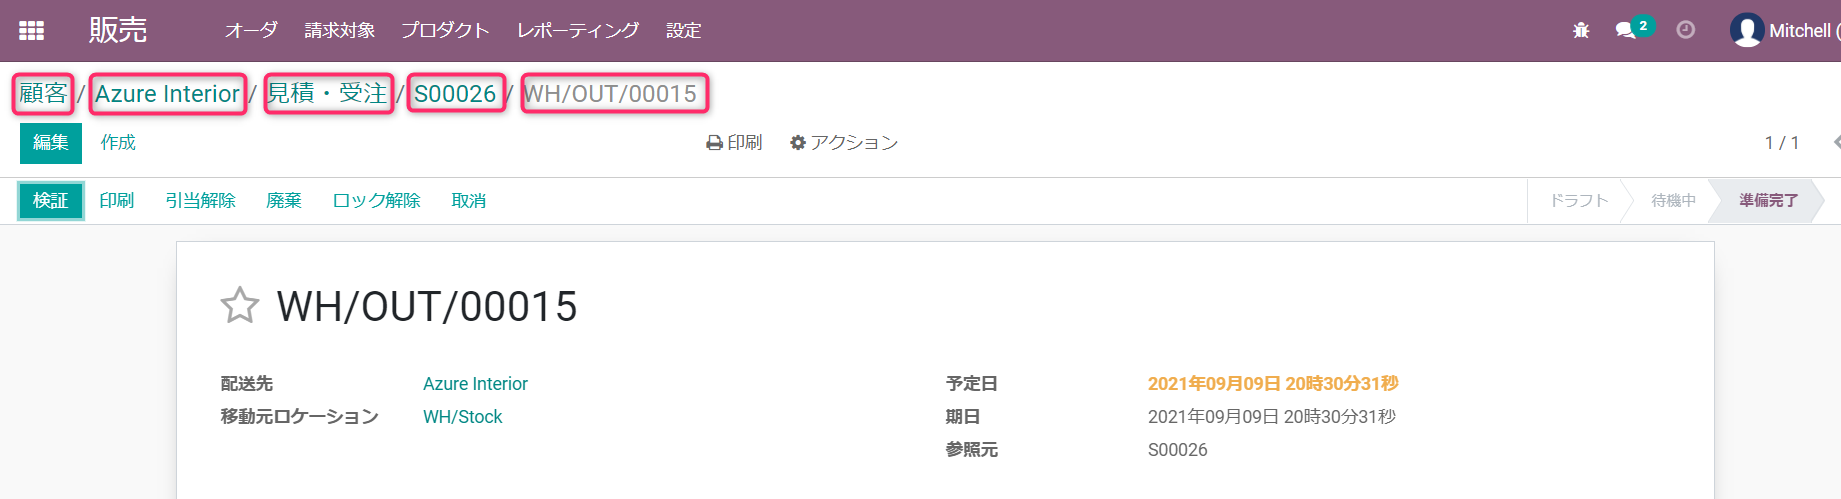
Odoo screens carry links and buttons that jump to another screen, and where you have been is shown at the top of the screen.
The image below is an example of moving through the customer master, then the form view of the customer chosen, then the order screen via the Sales button, then the form view of the order chosen, then the delivery screen via the Delivery button. Clicking any of the links takes you back to that screen.
(5) Copying
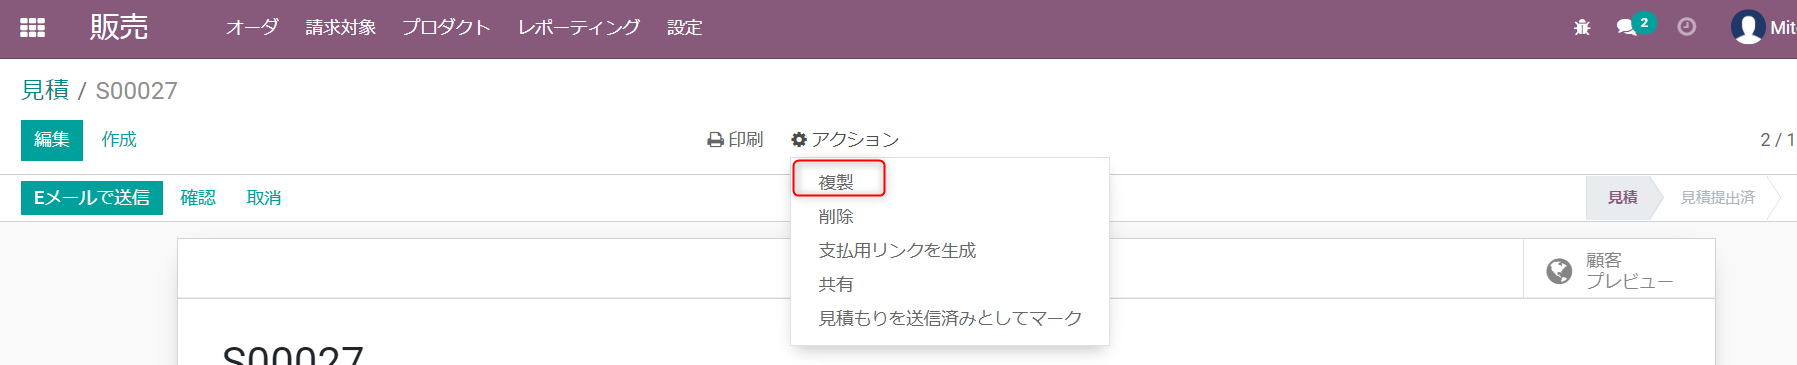
To duplicate a record, click “Duplicate” from the Action menu in the form view.
※ A note
When a record is duplicated, ”(コピー)” is added after the name of the copy. Correcting it in the display language does not correct the name in the other languages, which keep the ”(コピー)” — worth watching out for.
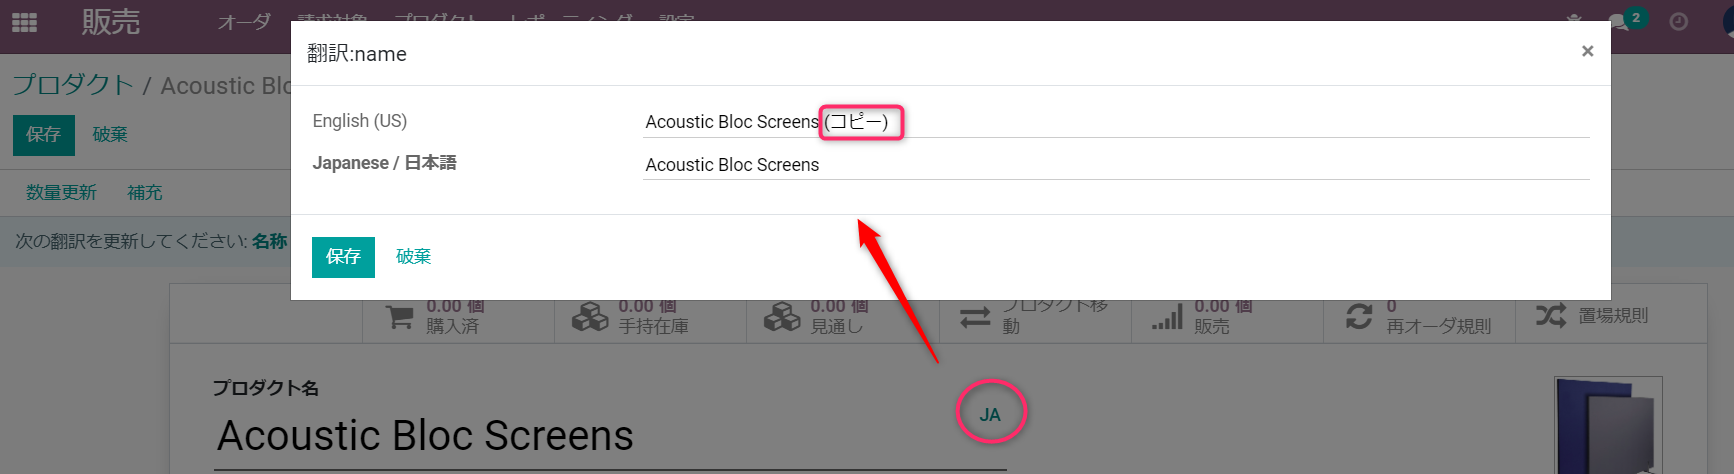
To correct them, click the language name beside the name field and correct the name for each language.
(6) Archiving
To archive master data, ① select the records in the list view, then ② click Archive from the Action button.

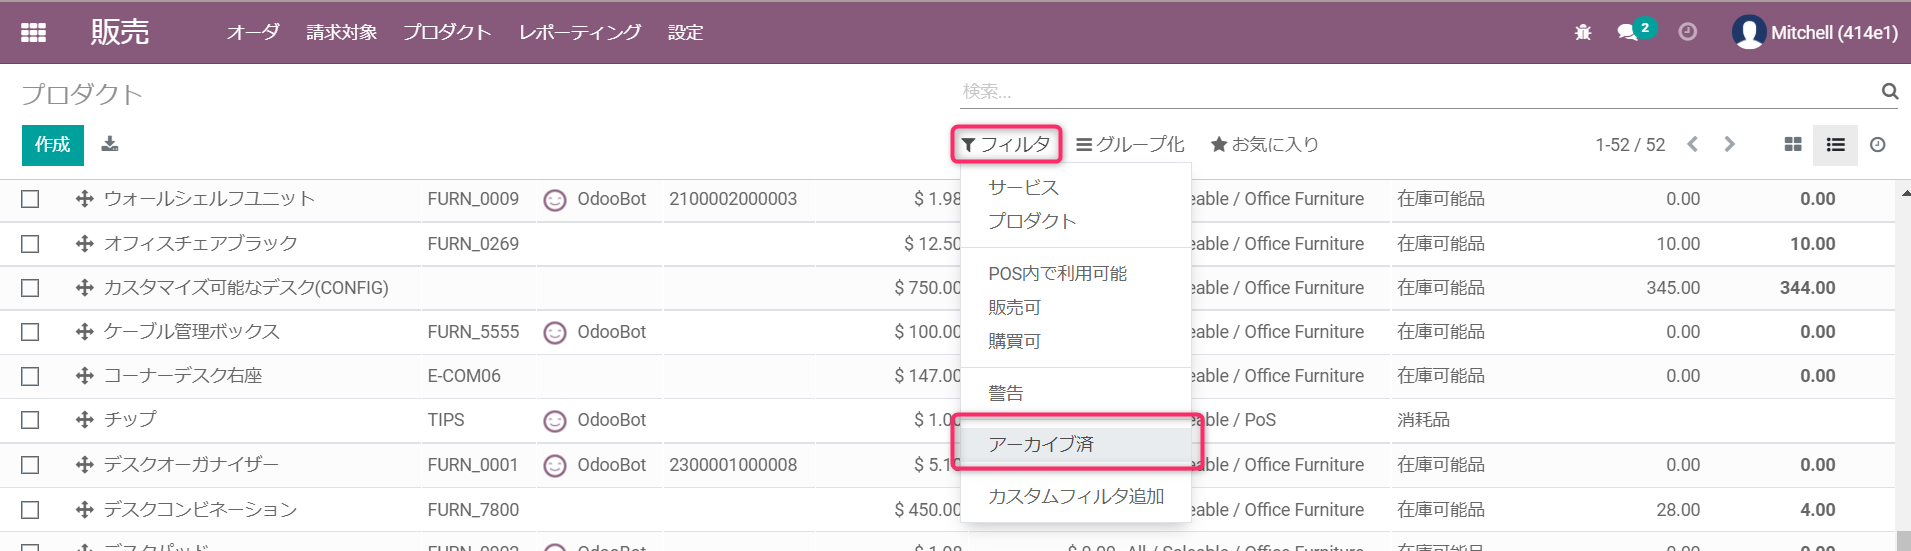
To see records once archived, click “Archived” from the drop-down menu on the Filters button.
(7) Import and export
To import data, click “Import records” from the Favorites button.

To export everything, click the “Export All” button at the top left. Every record is exported, for the columns currently shown and selected.

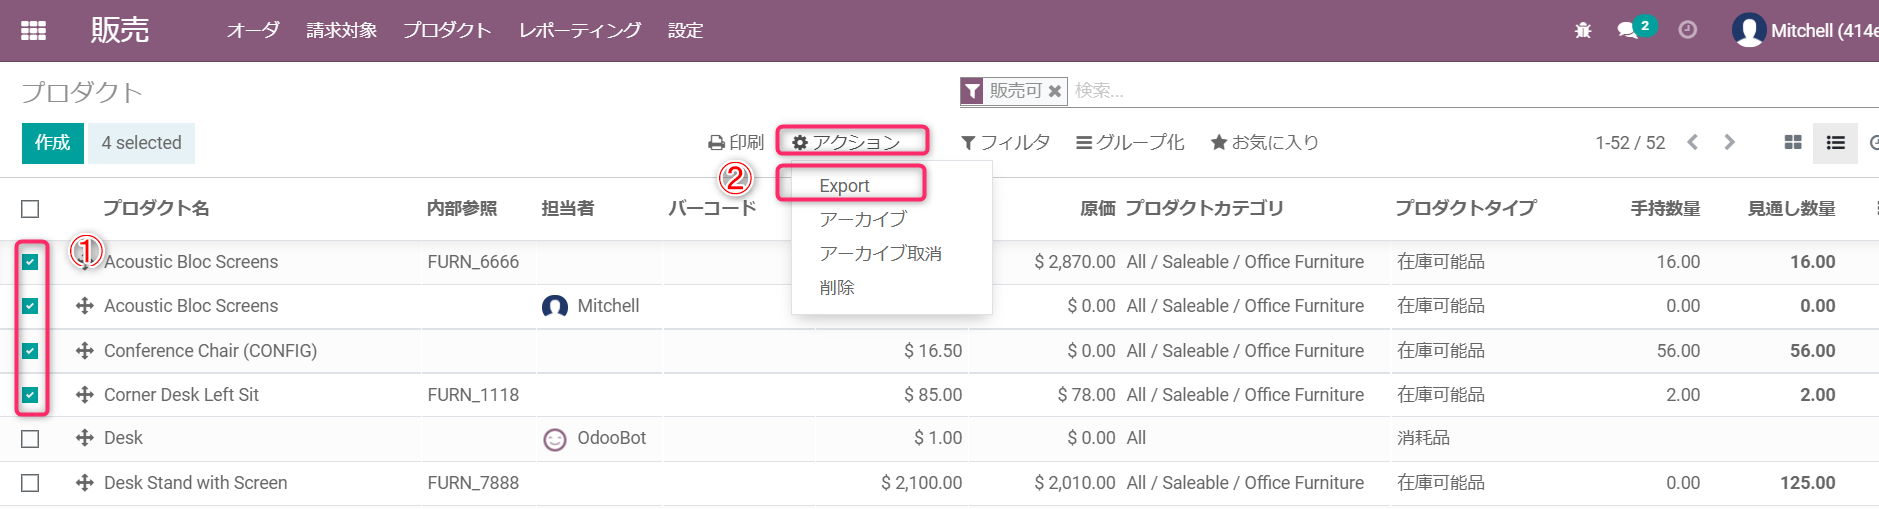
To export a chosen set of records or fields, ① select the records, then ② click “Export” from the Action button.
(8) Shortcut keys
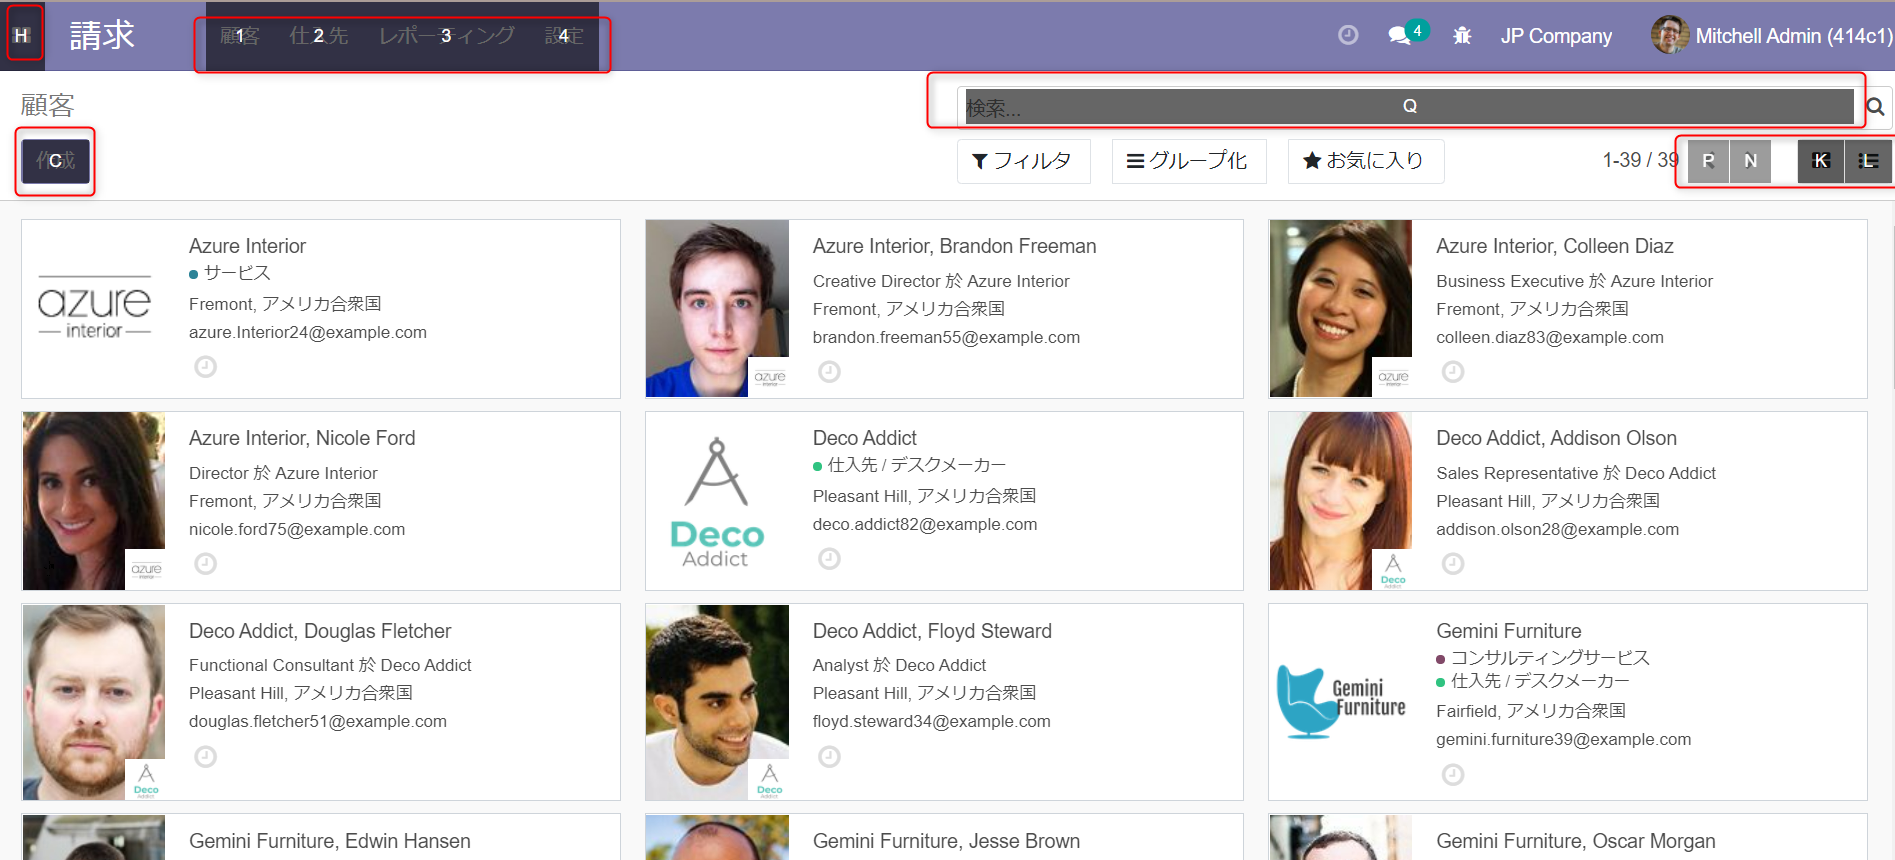
Press the Alt key on an Odoo screen and shortcut keys — letters and digits on a grey background — appear over the menus and icons. For a letter, press Alt plus that letter; for a digit, press Alt and Shift and the digit, and it is as though you had clicked that button. You can work Odoo without taking your hands off the keyboard, which is a convenient thing once you are used to it.
4. Searching the menus
Type what you are looking for on Odoo's menu screen and the menus containing those characters are shown. Handy when you are not quite sure where a menu was.
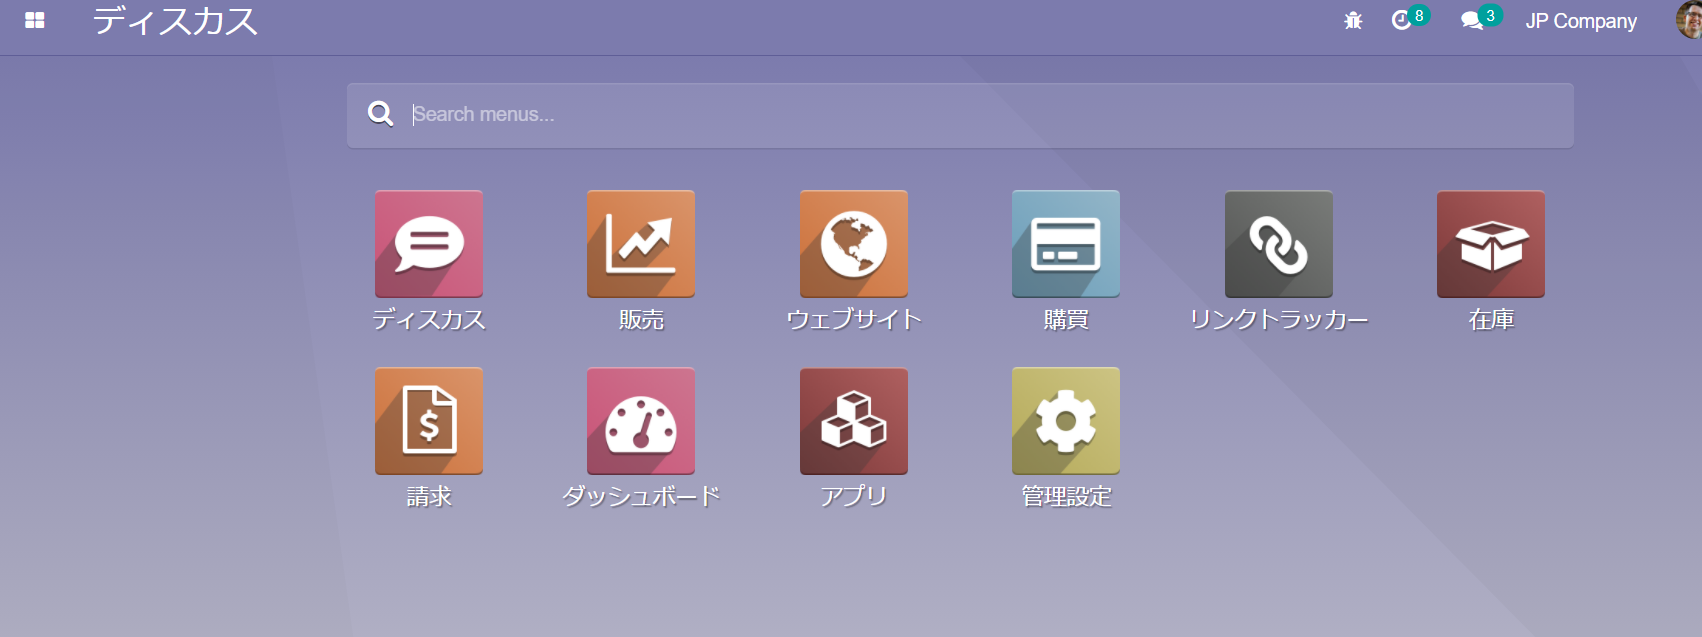
① On the first menu screen, type what you want to search for. No input box is shown, so anywhere will do.
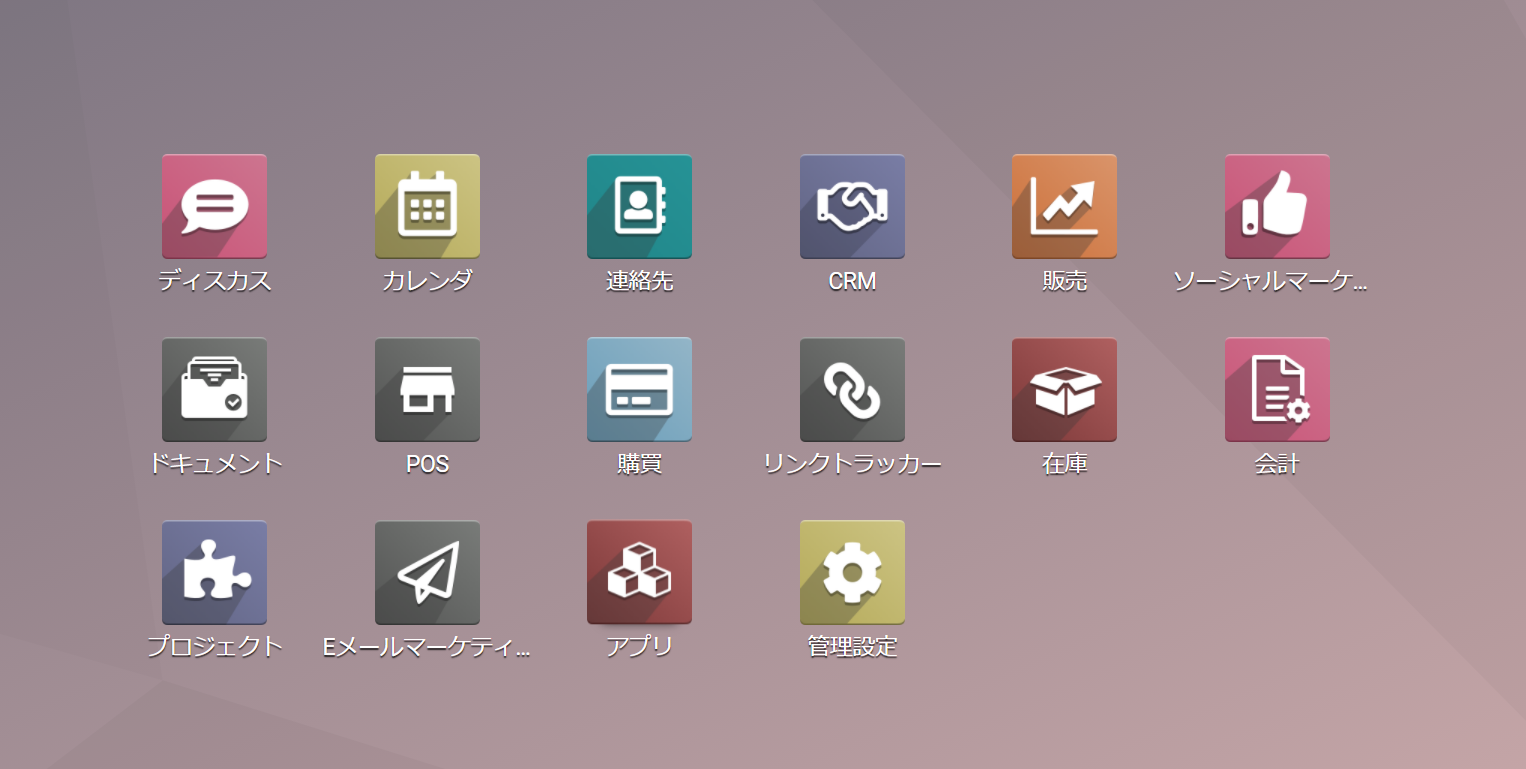
② The menus containing what you typed are listed, and clicking a menu jumps to that screen.
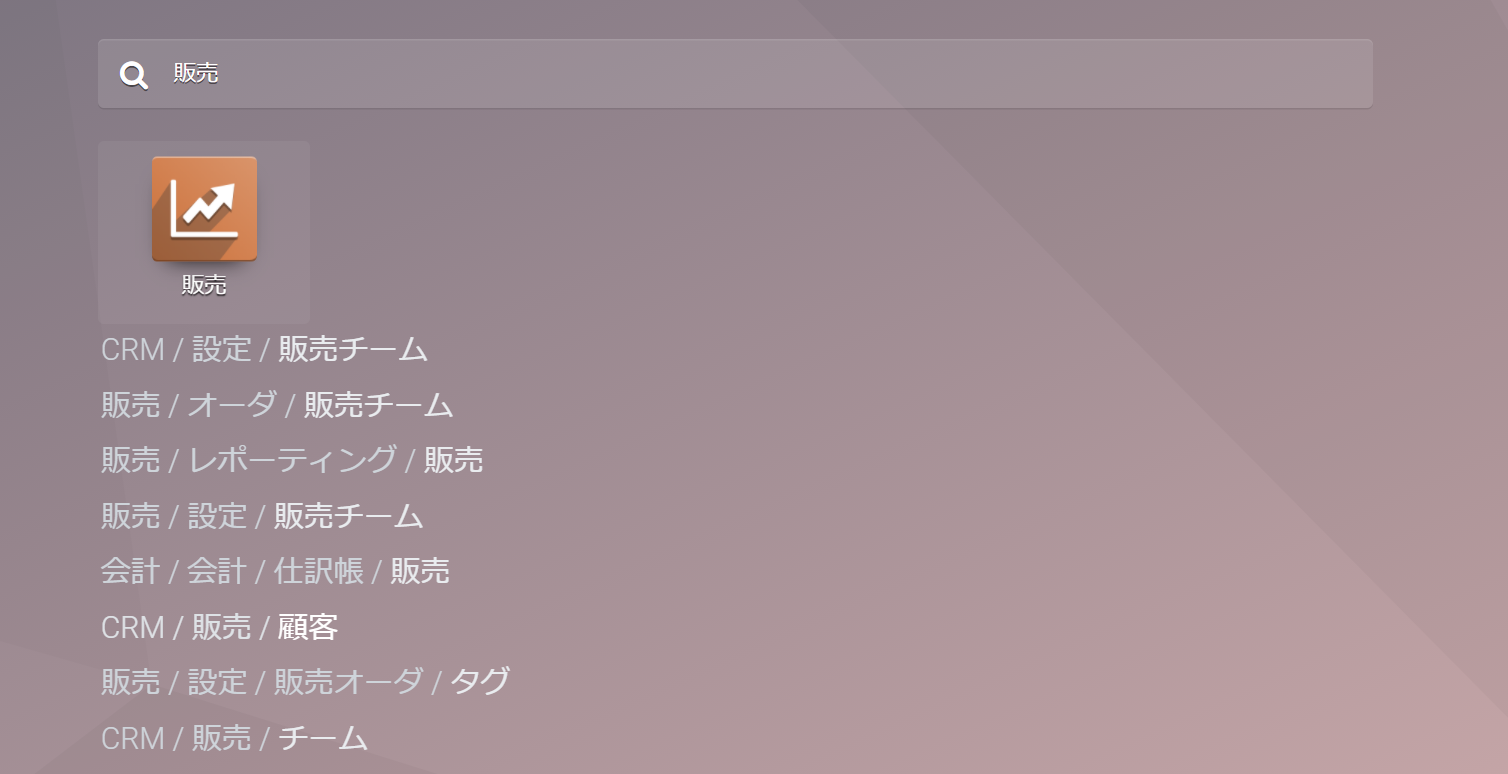
※ This feature belongs to the Enterprise edition of Odoo, but if you install the OCA module called web_responsive, you get much the same thing, as in the image below.
Related articles:
Basic common operations in Odoo V14.0