
Some basic configuration that is worth knowing when you first use Odoo.
On how to use Odoo, please see this blog post for the details.
1. Developer mode (Odoo documentation: Developer Mode(debug mode))
Before you can configure Odoo in any detail, the developer mode has to be turned on.
There are three ways to turn it on.
① Turn on “Activate developer mode” from the Settings menu
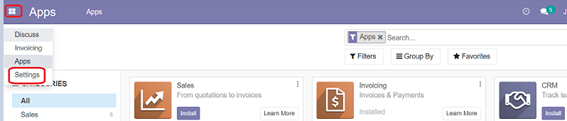
Click the square mark at the top left and choose Settings (管理設定) from the drop-down menu.
On the General Settings (一般設定) screen, click “Activate the developer mode”.
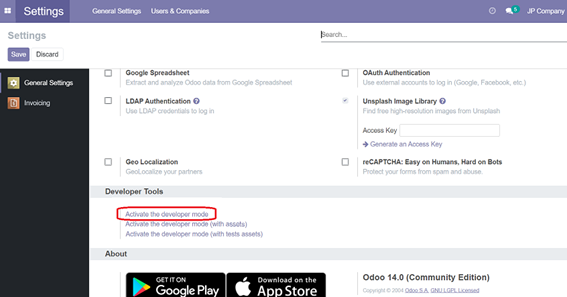
※ If this screen does not appear, install at least one app.
With the developer mode on, menus and tools that were hidden appear. Methods ② and ③ give the same result.

② Use the “Odoo Debug Extension” browser extension
In your browser (Google Chrome or Firefox), go to Settings > Extensions, search for “Odoo debug” and enable it.
If you are on Google Chrome, you can enable the Odoo Debug Extension from here instead.
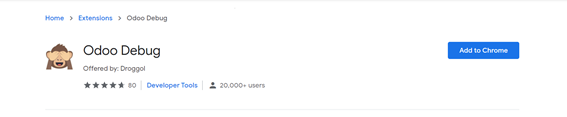
Once the Odoo Debug Extension is enabled, a monkey mark appears at the top right of the browser. Clicking it turns the developer mode on and off.

Turn the developer mode off and the icon changes to a monkey covering its face with its hands.

③ Insert “?debug=1” or “?debug=true” after the “....../web” in the URL.

Use “?debug=0” or “?debug=false” and the developer mode is turned off.
2. Language (Odoo documentation: Change language)
With the developer mode on, a Translations menu appears on the Settings screen. If you created the database in a language other than Japanese, turn Japanese on.
① Turning a language on
On Settings (管理設定) > Translations (翻訳) > Languages (言語), click “Activate/Update” on the “Japanese/日本語” row.

Click the “Add” button and Japanese is turned on.
② Switching the display language
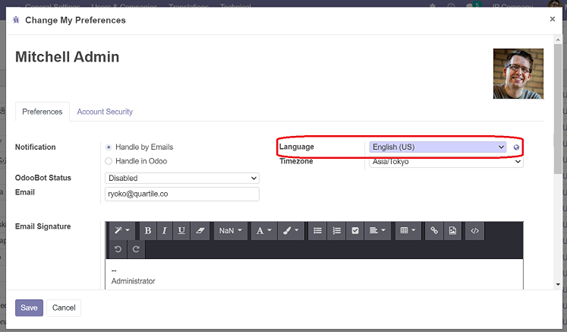
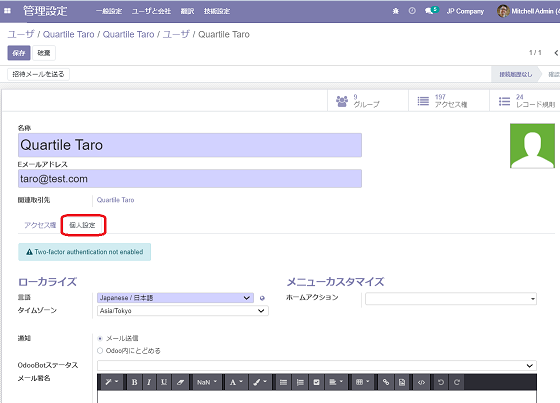
To switch the display language, click Preferences (個人設定) in the drop-down menu under your user name at the top right.

Choose a language in the Language (言語) field and save, and the language shown on screen changes. The display language is set per user.
3. Users (Odoo documentation: Manage users)
On Settings > Users & Companies > Users, click the Create button. Fill in the name, the email address and whatever else is needed.
The Access Rights tab is where you set the permitted companies and the app permissions.
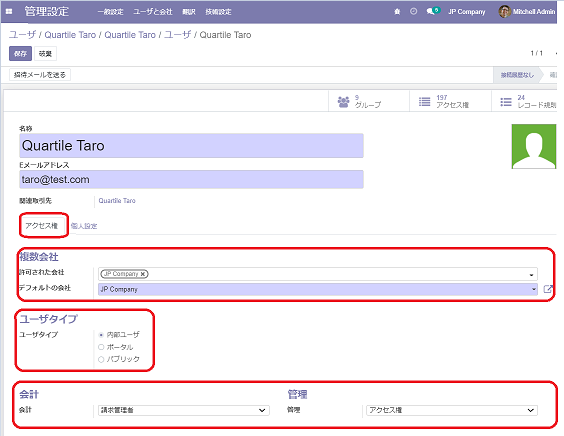
- Multi Companies: set which companies can be accessed and which is the default.
- User Type: choose between an internal user (an Odoo user) and a portal or public user, which is what you set for an external party such as a customer. Access rights cannot be chosen for those.
- App permissions: for each installed app and the rest, set the user's access rights app by app.
The Preferences tab shows the same screen as the Preferences item in the user-name drop-down above.
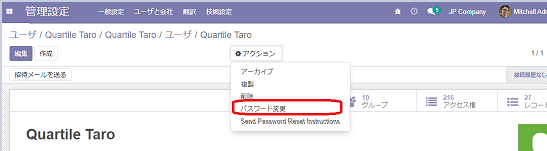
To set or change the password, save first, then click “Change Password” in the Action drop-down menu.
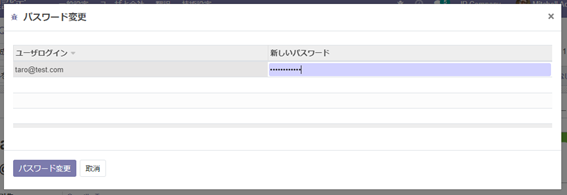
Type a password into the “New Password” field and click “Change Password”, and the password is set.
4. Groups (Odoo documentation: Access Rights)
Settings > Users & Companies > Groups is where a group's configuration can be seen.
A group carries settings for menus, for access rights — read, write, create and delete permissions per model — and for record rules, which restrict access to records; the Access Rights tab on a user ties a group to that user.
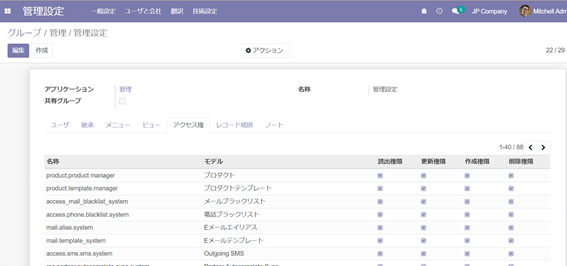
※ Changing access rights affects the database considerably, so take care.
5. Companies (Odoo documentation: Companies)
Settings > Users & Companies > Companies is where you set the company information: the address, the email address, the website and so on.
Click the pencil mark in the image field at the top right of the screen to set the logo. Set a company favicon as well and the image appears on the browser tab, which makes the company easier to tell apart.
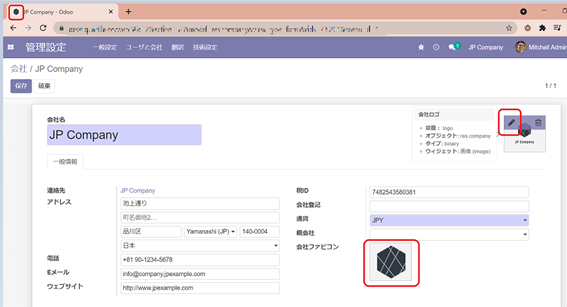
Switching company is done from the drop-down menu on the company name at the top right of the screen. The companies set as allowed companies in the user's Multi Companies setting are listed; the ones with a check mark can be accessed, and the one with the grey background is the company currently in use.

6. Apps (Odoo documentation: Apps and modules)
The Apps menu is where apps are installed, upgraded and uninstalled.
To search across the other modules as well, add “Extra” from the filter.
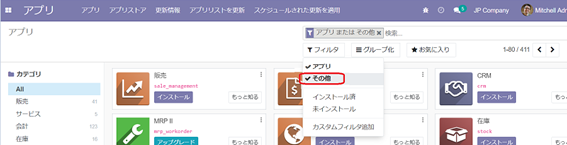
Click the Install button on the app you want and it is installed. Where an app has dependencies, those are installed automatically too. Install the Sales app, for instance, and Invoicing, which Sales depends on, is installed with it.
Click the three-dot button at the top right of an installed app and you can upgrade or uninstall it. An upgrade is needed when the Odoo source code has changed.
※ An installed app appears in the menu; if it does not, check the user's permissions in Settings.
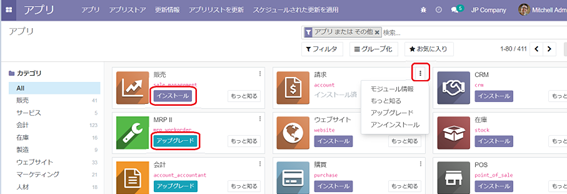
※ Clicking the “Upgrade” button on an Enterprise-edition app takes you to Odoo's pricing website.
Related articles:
Basic configuration in Odoo V14.0